When people talk about WordPress multi users, they could be referring to one of two very different things. The first, and most common, is simply having multiple user accounts with different roles—like Editors, Authors, and Contributors—all working together on a single website. The second, more complex setup is WordPress Multisite, which lets you run and manage a whole network of separate websites from a single WordPress installation.
Decoding WordPress Multi Users
So, what are we actually talking about here? A small team collaborating on a company blog, or a web agency juggling dozens of client sites from one place? It could be either. The key is that these two approaches solve completely different problems, and picking the right one from the start is crucial for building a site that's efficient and easy to manage.
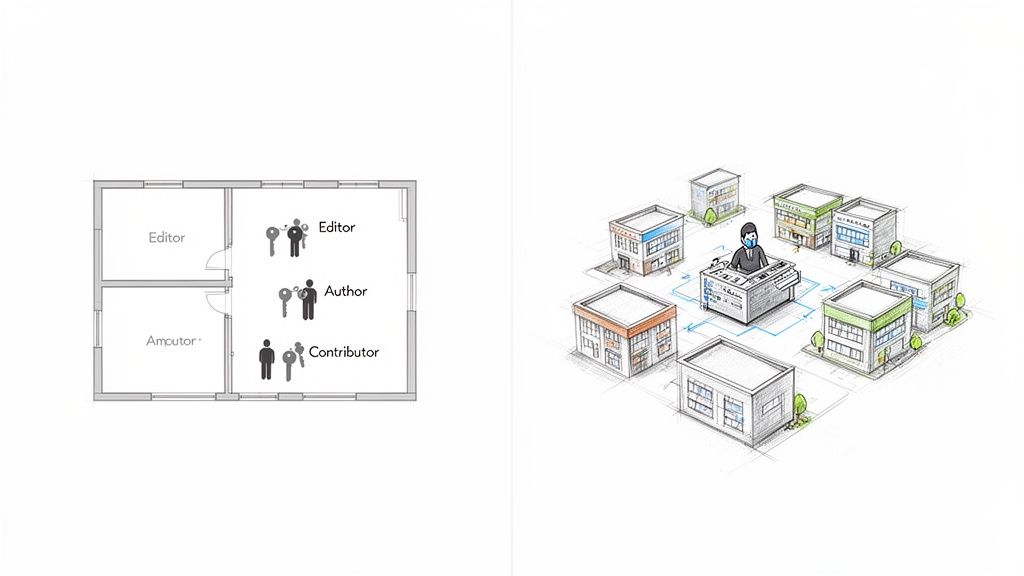
Think of it this way: a standard WordPress site with multiple users is like a single house. You, as the owner (Administrator), hold all the keys. You can give a key to the living room to a family member (Editor) and a key to just one bedroom to a guest (Contributor). Everyone is under the same roof, sharing the same plumbing and electricity. It’s perfect for a single blog, publication, or business with a team working together.
WordPress Multisite, on the other hand, is like being the landlord of an entire apartment complex. Each flat is a completely separate website, with its own tenants (content) and unique decor (theme). From your central management office (the network dashboard), you can install a new security system (a plugin) or repaint all the front doors (update a theme) across the entire complex at once. This model is built for scale—ideal for universities needing separate sites for each department, or a business with different websites for each country it operates in.
Choosing Your Path
So, which one is for you? It all comes down to what you're trying to achieve. This decision guide should help clear things up.
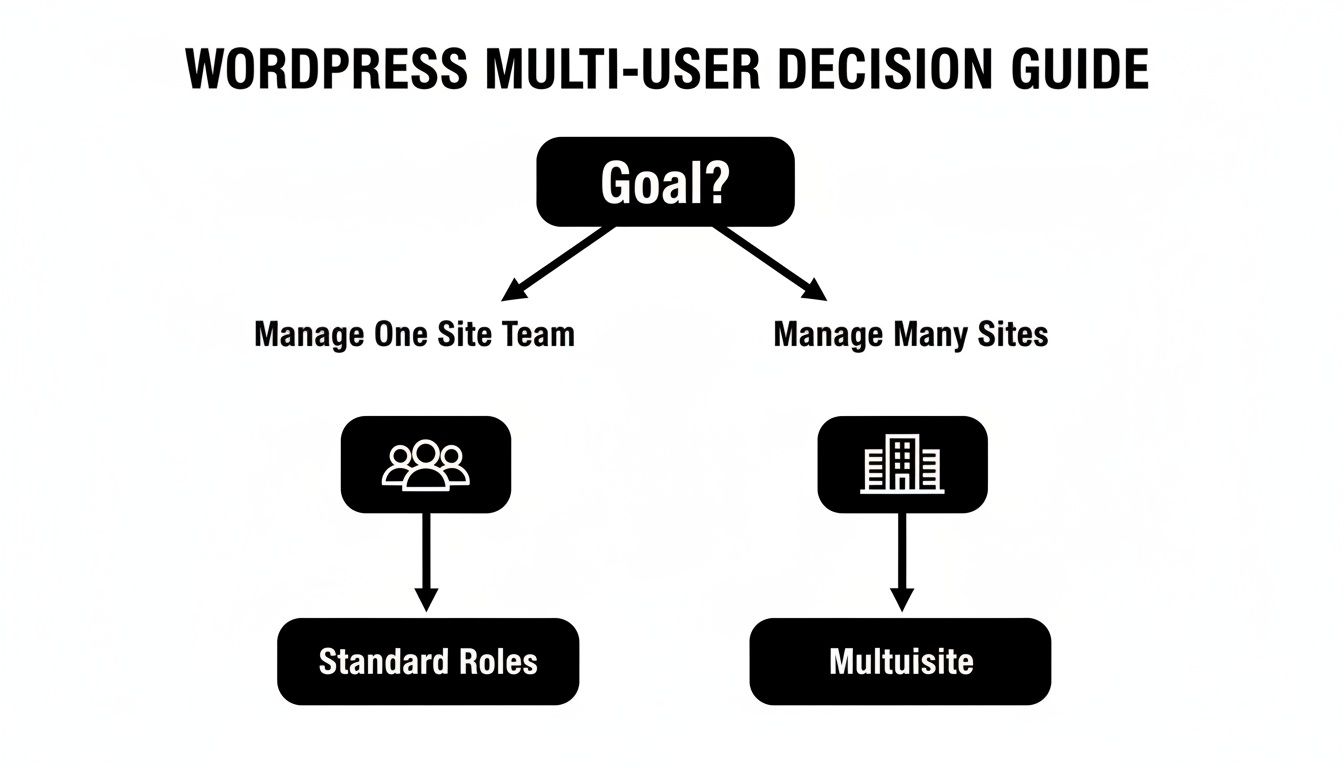
As you can see, the choice is pretty straightforward. If your goal is better collaboration on one website, standard user roles are what you need. If you need to efficiently manage many separate websites from a single dashboard, then Multisite is the way to go.
Key Takeaway: The term "multi users" isn't a single feature but a fork in the road. You're either choosing to deepen collaboration on one site or to broaden your control over many sites. Grasping this distinction is the first step to mastering WordPress management.
To help you visualise the differences, here’s a quick comparison.
Single Site vs Multisite At a Glance
| Feature | Standard WordPress (Multi-User) | WordPress Multisite |
|---|---|---|
| Primary Goal | Team collaboration on a single website. | Centralised management of multiple websites. |
| Site Structure | One website, one database. | A network of sites sharing one WordPress install. |
| User Management | Roles and permissions are set per site. | Super Admin role manages the entire network. |
| Themes & Plugins | Installed and managed individually for the site. | Installed by the Super Admin and activated per site. |
| Best For | Blogs, magazines, and businesses with a team. | Universities, franchises, agencies, site networks. |
Ultimately, choosing the right setup from the get-go will save you a world of headaches later on. It impacts everything from scalability and security to your day-to-day administrative workload.
It's also worth noting that if your main goal is fostering a vibrant community, you might find that dedicated best online community platforms offer features more suited to that specific purpose. The important thing is to match the tool to the job.
Mastering User Roles on a Single WordPress Site
For most people, a single WordPress site is the centre of their online world. This is where WordPress's built-in user role system really shines, acting as the foundation for secure and organised team collaboration. Think of it like giving out keycards for an office building – the receptionist doesn't need a key to the server room, and your guest blogger certainly doesn't need access to your site's core settings.
Understanding these roles is more than just memorising a list; it's about strategically applying them to your real-world workflow to tighten security and make everything run smoother. When you get the roles right, you empower your team to do their best work without accidentally handing over the keys to the entire kingdom.
A Closer Look at the Core WordPress User Roles
Out of the box, WordPress gives you five default user roles. Each comes with a specific, pre-defined set of permissions, creating a clear hierarchy of who can do what on your website.
Let's break down what these roles actually mean in practice.
- Administrator: This is the super-user with absolute power. An Admin can do everything: install themes, add or delete plugins, fiddle with code, and even delete the entire site. This role should be guarded carefully and given only to site owners or a trusted technical lead.
- Editor: The content chief. An Editor has full control over the site's content – they can publish, edit, and delete any post or page, including those written by others. They also manage comments and categories, making this the perfect role for a head of content or managing editor.
- Author: The creator. Authors can write, edit, and publish their own posts. They can’t touch anyone else's work or mess with site-wide settings, which keeps them focused squarely on producing content.
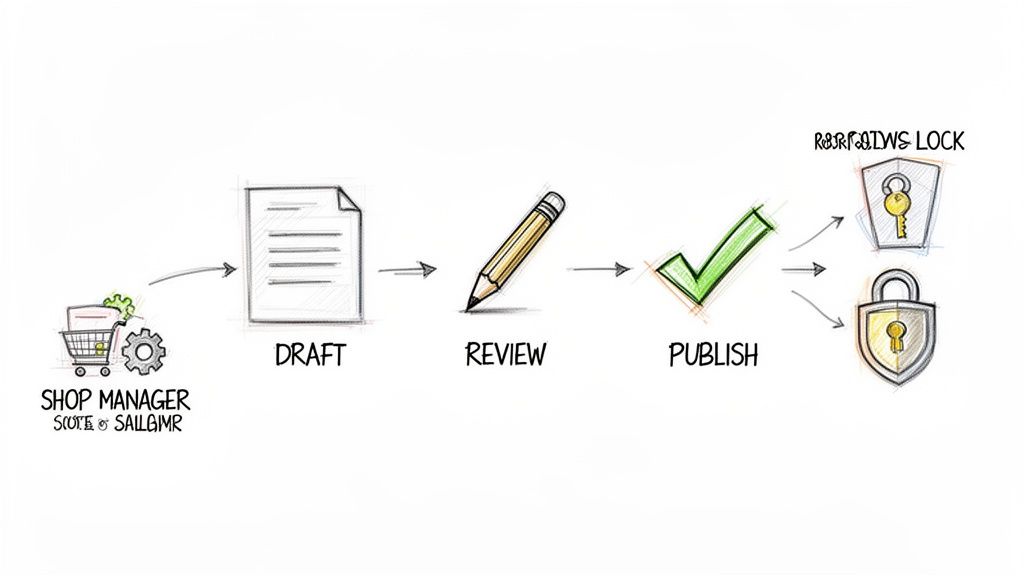
- Contributor: The apprentice. A Contributor can write and edit their own posts but importantly, they cannot publish them. Their work sits in a pending queue until an Editor gives it the green light, which is a fantastic quality-control checkpoint for any content team.
- Subscriber: The most limited role. Subscribers can simply log in and manage their profile. This is mainly useful for membership sites or if you require users to register before they can leave comments.
Putting User Roles to Work
Let's say you run an online shop with WooCommerce. You need someone to manage stock and handle orders, but you’d rather they didn't have the ability to change your website's design. The Shop Manager role, which WooCommerce adds, is the perfect solution. It gives them access to products and orders without touching core WordPress settings.
Or, imagine you have a popular blog and bring in freelance writers. By assigning them the Contributor role, you ensure every article they submit waits for your in-house Editor to review and approve it. This simple step keeps your brand voice consistent and prevents rogue posts from going live.
Crucial Insight: The entire WordPress user role system is built on a security concept called the "principle of least privilege." This means you should always give users the minimum level of access they need to do their job, and nothing more.
Customising Roles for Pinpoint Control
Sometimes, the default roles just don't quite fit. What if you want an Author to be able to upload media but not actually publish their own articles? This is where you move beyond the basics and start looking at plugins to really nail your WordPress multi users setup.
Tools like the User Role Editor plugin give you incredible, granular control over permissions. You can create brand-new roles from scratch or tweak the existing ones by simply ticking boxes for different capabilities.
For instance, you could create a "Marketing Intern" role that can draft new posts and view analytics reports, but can't publish anything or edit another user's work. This kind of customisation is what allows you to scale your team securely, ensuring everyone has exactly the tools they need—and not a single permission more.
When Should You Choose WordPress Multisite for Your Project?
Deciding to switch from a standard WordPress site to a full-blown Multisite network is a major move. It isn't just a simple upgrade; it’s a complete change in how you manage your digital footprint. Getting this right comes down to your project's scale, your long-term vision, and the resources you have to run it.
Let's use an analogy. Imagine you're running the IT department for a large university. You've got the main university website, of course. But every academic department—History, Engineering, Arts, you name it—also needs its own unique site. Trying to manage 30 separate WordPress installations would be an absolute nightmare of endless updates, security patches, and user logins. This is the perfect storm where Multisite shines.
Clear Signs You Need Multisite
So, when is it time to take the leap? Certain business models and organisational structures are practically made for a Multisite network. If you recognise yourself in any of these scenarios, it’s a strong sign that Multisite is the way forward.
- Franchise Businesses: Think of a national brand with dozens of local shops. The head office needs to enforce consistent branding, but each franchisee needs to manage their own local content and opening hours. Multisite lets the parent company roll out the official theme and plugins, while each store owner controls their own little corner of the web.
- Educational Institutions: Just like our university example, schools with multiple departments, research labs, or even student blogs can centralise everything. This keeps security tight and the branding consistent across the entire institution.
- Real Estate Agencies: A main agency can provide a pre-built, templated website for each of its agents. The agents get to manage their own property listings on their individual sites, all while benefiting from the agency's brand and technical support.
- Website-as-a-Service (WaaS) Platforms: If your business is built on selling websites to clients—like a service for wedding websites or online portfolios—Multisite is the engine you need. It lets you spin up new client sites in a flash.
The Litmus Test: Just ask yourself this one simple question: "Do I need to manage lots of related websites from one dashboard, using the same set of themes and plugins?" If the answer is a firm "yes," then you're ready for Multisite.
The Trade-Offs of Centralised Control
The biggest win here is efficiency, especially as you scale. As the network's Super Admin, you can update a plugin or a theme just once, and that change instantly applies to every single site in your network. This is a massive time-saver and a huge boost for security.
But with great power comes great responsibility. Not all WordPress plugins play nicely with Multisite, and you can run into frustrating compatibility issues. Worse, since all your sites share one WordPress installation and one database, a security breach or a performance problem on a single site could potentially bring down the entire network.
This added complexity means you can't skimp on hosting. A cheap shared hosting plan that was fine for a single site will likely buckle under the strain of a Multisite network. You'll need something far more robust, like a VPS or a managed WordPress host properly optimised for this kind of setup. For a deeper dive, you can explore our expert insights on how to manage multiple WordPress sites.
This approach has proven especially valuable in the UK, where digital agencies use WordPress multi users functionality to efficiently manage client portfolios. In fact, UK small businesses using these kinds of setups have reported a 22% increase in content output, a testament to the productivity gains.
A Practical Guide to Setting Up Your Multi-User Environment
Alright, we’ve covered the "what" and "why" behind WordPress's multi-user capabilities. Now it’s time to roll up our sleeves and get practical.
Whether you're just looking to add a few team members to your blog or you're planning to launch a full-blown network of websites, getting the initial setup right is crucial. This guide will walk you through both scenarios, breaking down the technical steps and pointing out the best practices I’ve learned over the years.
Let's turn theory into action and get your environment configured correctly from day one.
Adding New Users to a Standard WordPress Site
This is the most common and straightforward way to bring other people into your website. It’s perfect for teams collaborating on a single project, like a company blog or an online shop. The best part? It’s incredibly quick and all done from your WordPress dashboard.
Here’s the step-by-step process:
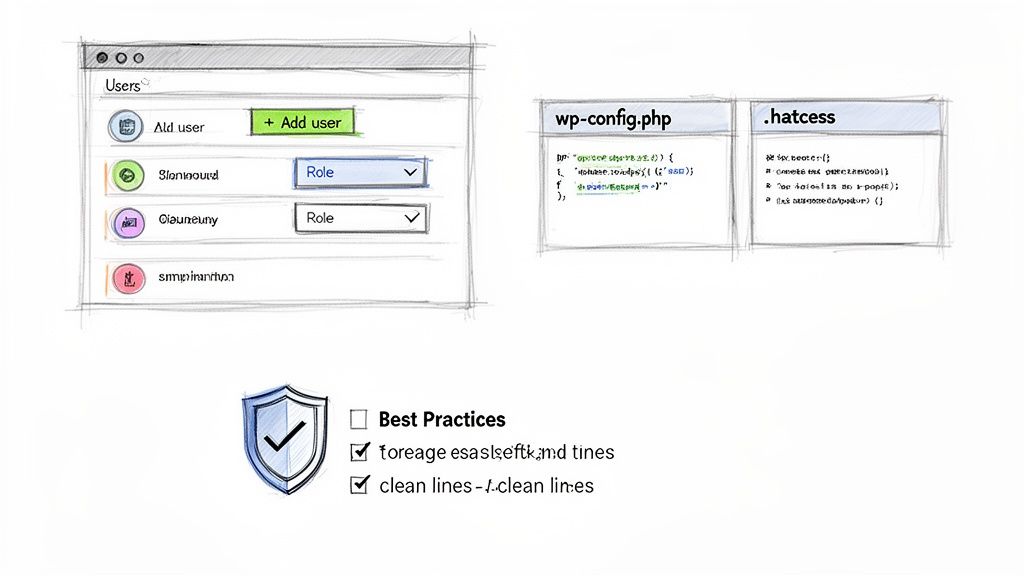
- Head to the Users Panel: On your dashboard's left-hand menu, find "Users" and click "Add New."
- Fill in Their Details: A simple form will appear. You'll need to create a username (which can't be changed later, so choose wisely!) and add their email address. The other fields like name and website are optional.
- Assign Their Role: This is the most important step. Use the dropdown menu to select the right role—be it Contributor, Author, Editor, or something else. Always stick to the principle of least privilege: give people only the access they absolutely need to do their job.
- Send the Invite: Make sure the box is ticked to send the new user an email notification. This email gives them a link to set their own password, which is a non-negotiable security practice.
Once you start adding users, having a clear plan for them is key. Understanding effective user onboarding best practices will help everyone get started smoothly and feel confident using the site.
Pro Tip: Make a habit of auditing your user list. At least once a quarter, pop over to the "All Users" screen. Clean out old accounts and adjust roles for people whose responsibilities have changed. Inactive user accounts are a classic, and easily avoidable, security risk.
Activating a WordPress Multisite Network
Now for the more advanced option. Turning on Multisite is a bigger commitment that involves editing core WordPress files. This isn't for the faint of heart, and you should always, always back up your entire website before you even think about starting.
This process transforms your single WordPress installation into a central hub capable of running a whole network of sites.
Remember, a Multisite network needs a solid foundation to perform well. If you’re juggling multiple client sites, a specialised solution like our managed WordPress hosting in the UK can provide the extra power and security you need to keep everything running smoothly without the headaches.
Step 1: Allow Multisite in Your Configuration File
First, we need to let WordPress know you intend to unlock this feature. This is done by adding a single line of code to one of your site's most critical files.
- Connect to your website's files using an FTP client or your hosting provider's file manager.
- Find the
wp-config.phpfile, which sits in the main (root) directory of your site. - Open the file for editing and add the following line just before the comment that says
/* That's all, stop editing! Happy publishing. */:
define( 'WP_ALLOW_MULTISITE', true ); - Save the file and upload it back to the server. This doesn't activate anything just yet, but it makes the necessary setup tools appear in your dashboard.
Step 2: Configure the Network
With that line of code saved, go back to your WordPress dashboard and give it a refresh. You should now see a new "Network Setup" option under the "Tools" menu.
Click on it, and WordPress will present you with a big choice: do you want to use sub-domains (e.g., site1.yourdomain.co.uk) or sub-directories (e.g., yourdomain.co.uk/site1) for new sites in your network?
- Sub-domains work brilliantly for distinct entities, like a university giving each department its own unique web address.
- Sub-directories are often better for closely related sites, like a main company website with smaller sites for each regional branch.
Think carefully about this decision, because changing it later is a real headache. Once you've made your choice and filled in the network details, click "Install."
Step 3: Finalise the Installation
You're almost there! WordPress will now show you two last pieces of code. These need to be added to your wp-config.php and .htaccess files.
Follow the instructions on the screen to the letter. The first code snippet goes into your wp-config.php file (right where you added the first line). The second snippet goes into your .htaccess file, completely replacing the existing WordPress rules.
Once you’ve saved both files, your Multisite network is live. You’ll need to log in again, but this time you'll be greeted by a new "My Sites" menu in the top admin bar. Congratulations, you're now the Super Admin of your very own network
Essential Security Practices for Multi-User Sites
Bringing more users onto your WordPress site is a bit like handing out keys to your office. It’s fantastic for collaboration, but every new key introduces a potential security risk. The goal isn’t to lock everyone out; it’s about being smart with who gets which key and building a secure space for your team to do their best work.
This is especially critical in the UK, where WordPress is an absolute powerhouse. As of early 2024, it runs a staggering 1,083,275 live websites, making it the go-to choice for businesses of all sizes. With so many sites relying on it, solid security isn't just a good idea—it's essential.
Embrace the Principle of Least Privilege
If there's one security concept to get right in a WordPress multi-users setup, it's the principle of least privilege. The idea is simple but incredibly effective: only give users the absolute minimum permissions they need to do their job.
Think about it this way: a guest blogger needs to write and submit a post for review. They have no business installing plugins or fiddling with your site's theme. By giving them the Contributor role, you hand them the exact tools they need and nothing more. This drastically shrinks your attack surface, because even if that user's account gets compromised, the damage they can do is massively limited.
Key Takeaway: Never hand out Administrator access unless it’s absolutely necessary. For every new user, ask yourself, "What's the lowest-level role this person can have and still do their work?" That simple question is your best line of defence.
Make a habit of auditing your user list every quarter. People change roles, and contractors finish projects—their access should reflect that.
Bolster Your Defences with Stronger Authentication
Weak and reused passwords are the low-hanging fruit for attackers. Just asking your team to create strong passwords is a start, but you can't rely on hope alone. It's time to add some real muscle to your login process.
Two-Factor Authentication (2FA) is a game-changer. It forces users to provide a second piece of evidence to prove their identity—usually a time-sensitive code from their phone. This means that even if a hacker steals a password, they're stopped dead in their tracks without the user's physical device.
Here are a few practical steps you can take right now:
- Enforce Strong Passwords: Use a plugin that forces everyone to use complex passwords with a minimum length and a mix of characters.
- Implement 2FA: Install a reputable security plugin that adds 2FA to your login page. It's a standard feature in most of the top security suites.
- Limit Login Attempts: Protect against brute-force attacks by automatically blocking IP addresses after a few failed login attempts.
Monitor User Activity and Maintain Performance
When you've got multiple people making changes, you need a clear record of who did what, and when. Think of an activity log plugin as a CCTV camera for your WordPress dashboard. It keeps a running tally of important actions like plugin installations, user role changes, and content edits.
This log becomes invaluable when you need to troubleshoot a problem or investigate something that looks a bit off. If a page suddenly looks broken, you can quickly check the log to see who touched it last.
Beyond security, more users can put a strain on your server. Each person logged into the dashboard can bypass the caching that keeps your site fast for visitors, potentially slowing things down for everyone. A high-performance host like Vivihosting helps counter this with server-level optimisations designed for dynamic, multi-user traffic.
And finally, always have an escape plan. The best security strategy includes knowing what to do when things go wrong. Our guide on how to back up your WordPress site walks you through creating that safety net. In a multi-user site, regular, automated backups are non-negotiable.
Right, let's look at some plugins that can really take your multi-user setup to the next level. While the standard WordPress user roles are a decent starting point, you'll likely find they don't quite fit your team's unique workflow. A few choice plugins can make all the difference, giving you much tighter control and a smoother, more secure operation.
Think of these tools as upgrades to your WordPress dashboard. They solve specific, common problems, like creating a unique permission set for a freelance writer or keeping a detailed log of every change made to your site. They're designed to fill the gaps in the default WordPress setup.
Fine-Tuning Permissions
The out-of-the-box WordPress roles are great, but they're a bit rigid. What if you need someone who can edit posts but not publish them? Or a user who can manage comments but not touch plugins? That’s where role editor plugins come in.
User Role Editor: This is pretty much the industry standard for a reason. It gives you a simple, checkbox-based interface to create brand-new roles from scratch or just tweak the existing ones. For instance, you could create a "Content Reviewer" role that can edit posts and pages but is blocked from hitting the publish button.
Members: Another fantastic choice, Members offers a really clean way to manage roles and capabilities. It’s especially good if you want to restrict content, making certain pages or posts available only to users with a specific role.
A Quick Tip: Customising roles isn't just about giving people more permissions. It's often more about taking them away. By limiting users to only the tools they absolutely need, you drastically reduce the risk of someone accidentally breaking something important. It's a simple but powerful security win.
Better Security Through Better Oversight
When you've got a team working on your site, knowing who did what—and when—is crucial. An activity log is like a security camera for your WordPress admin area, giving you a complete record of every action.
- WP Activity Log: If you're serious about security, you need this plugin. It keeps a comprehensive, real-time log of literally everything: user logins, content changes, theme tweaks, plugin updates, you name it. If a page suddenly looks wrong or a post goes missing, this log will be your first port of call to solve the mystery.
Essential Tools for Multisite Networks
Running a full WordPress Multisite network is a different ball game. You’re not just a site admin; you're a Super Admin, and you need tools built for the job.
- NS Cloner – Site Copier: Honestly, if you manage a Multisite network, this plugin is a lifesaver. It lets you duplicate any site on your network in a matter of clicks. Imagine you're building sites for different departments or clients that all start from the same template. NS Cloner automates that entire process, saving you an incredible amount of time.
Frequently Asked Questions About WordPress Multi Users
Jumping into the world of WordPress multi users often brings up a few common questions, especially when you're weighing up standard user roles against a full-blown Multisite network. Let's clear up some of the most frequent queries we hear so you can manage your setup with confidence.
Can I Have Multiple Blogs on One WordPress Site?
Yes, but how you do it depends entirely on what you're trying to achieve. If you just want different blog sections on one website—say, a "Company News" blog and a separate "Industry Insights" blog—you can easily handle that with categories. Simply create your posts, pop them into the right category, and then use your theme to display posts from only that category on a specific page. It's simple and effective.
However, if you're talking about running completely separate, standalone blogs with their own settings, user bases, or even themes, then WordPress Multisite is what you're looking for. This feature lets you manage a whole family of distinct sites from a single WordPress installation.
How Many Users Can I Add to My WordPress Site?
The short answer? As many as you want. WordPress itself doesn't put a hard limit on the number of users you can add. You could have 5 editors or 5,000 subscribers.
The real constraint isn't WordPress; it's your hosting. Every user, particularly those logged into the admin dashboard, uses up a bit of your server's processing power and memory. As your team or user base grows, you'll need a solid hosting environment to keep your site from slowing to a crawl.
A key thing to remember is that logged-in users often bypass the caching systems that make your site fast for the public. Every action they take hits the server directly, so the number of people working behind the scenes at the same time is a huge factor in performance.
What Is the Difference Between a User and a Super Admin?
Think of it like this: a standard User, even an Administrator, is the manager of a single shop. They have the keys to that one location, letting them change the layout (theme), install new equipment (plugins), and manage all the stock (content).
A Super Admin, on the other hand, is the CEO of the entire retail chain. This role only exists in a WordPress Multisite network and gives someone ultimate control over the whole network of sites. They're the only ones who can decide which themes and plugins are available to all the shops, open or close new locations (add or delete sites), and set company-wide policies (network settings). The Super Admin oversees all the individual shop managers.
Managing a growing team or a network of sites demands a hosting foundation that’s both powerful and secure. At Vivihosting, we offer specialised UK-based managed WordPress hosting built to handle the complexities of collaborative projects and Multisite networks, making sure your setup stays fast and reliable as you scale. Find out more at https://vivihosting.com.